
Introduction
Earth Day is upon us and what better than a free project using fabric scraps? I've been reading lots of books recently, rediscovering my childhood love and this inspired me to design a fabric bookmark.
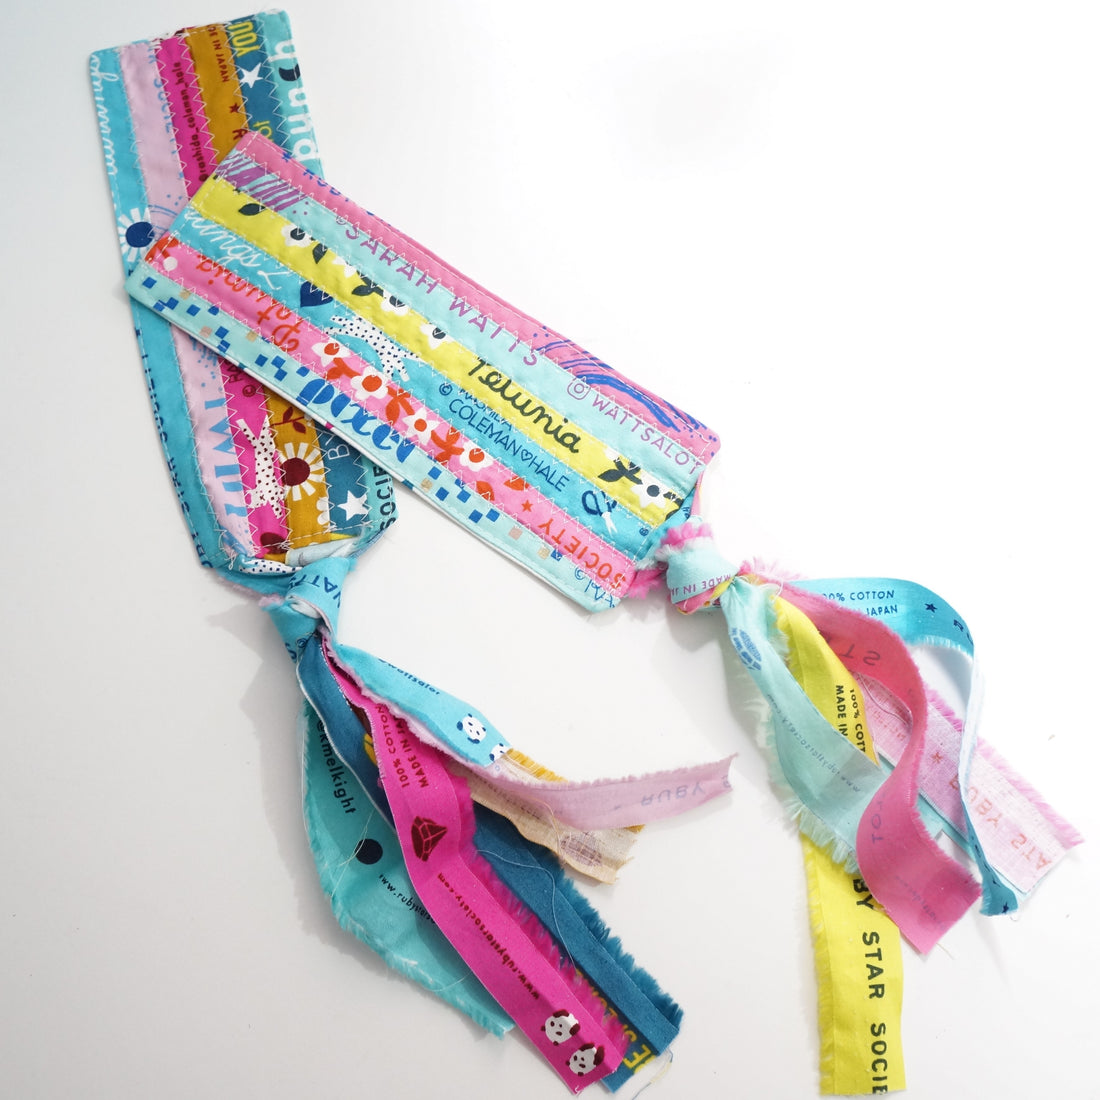
Another love of mine (I have many) is Ruby Star Society Fabric Selvages! Usually the selvage (or selvedge) is just something you cut off and discard. But RSS's selvages come in cute colours with the designer's and collection's name printed on them.
This project uses Foundation Paper Piecing (FPP) and assumes you know how to do this technique. If you're a beginner check out this tutorial from gnome angel here
The finished size of the bookmark is 3 by 8", plus tassel.
Feel free to share this pattern/project with friends and sell the finished items! I'd love to see what you make so please tag me on social media (@flosscandyshop on most platforms).
Download Free Template Here
Materials/Supplies
- 6 x RSS selvages, approx 0.5m/20" long by 1" wide (can be a little shorter, your tassel with just be shorter!) for the front of the bookmark and tassel.
- A piece of scrap quilting cotton fabric 3.5 x 8.5" for the back of the bookmark
- Printer & Paper
- Sewing Machine
- Sewing Thread
- Pins
- Fabric Scissors
- Rotary Cutter
- Quilting Ruler & Mat
- Iron & Ironing Board
- Optional; Starch Spray
Instructions
1. Selvages can be kinda tricky to work with, I pressed and starched mine first to make it a bit easier.
2. Download, print & cut out the template (make sure to print at 100%). Trim your Selvages to 8.75" long, keeping the longer lengths to make the tassel later. Use the FPP method to sew the six selvages to the template. Depending on the width of your selvages you might need to place your selvages so that there's less than a 1/4 seam. If you find a seam bursts a bit when you remove the paper, don't panic - we'll be topstitching over the seams later.
3. Once all six selvages are sewn to the template, remove the paper.
4. Then using your rotary cutter and mat trim the fabric to the size of the template. This piece is now called the Bookmark Top.

5. Place your Bookmark Top right side facing up. Take your leftover long Selvages, pair them up and then place them on top of your Bookmark Top, right sides facing down. Make sure they're a 1/4" away from the long edges and overhanging the short edge by about 1/4". (In the photo I accidently placed a couple right side facing up, oops! We'll be tying a knot later it worked out okay!)
6. Place your 3.5 x 8.5" quilting cotton fabric on top, right side facing down and line up the edges. Pin together, tucking the long selvages in away from the edges (except the overhang).
7. Sew around the edge a 1/4" in, leaving a gap so you can turn the bookmark the right side out.
8. Turn the bookmark the right side out and give it a good press, making sure the seam allowances of the gap are turned in.
9. Using a longer stitch, top stitch around the perimeter. Then using a zig zag stitch, top stitch on top of the selvage seams.
10. Tie a knot using the selvage lengths, making sure there's enough ease for the bookmark to lie flat.